# Request body parameters
When you need to send data from a client to your API, you send it as a request body. A request body is data sent by the client to your API. A response body is the data your API sends to the client.
Your API almost always has to send a response body. But clients don't necessarily need to send request bodies all the time. To declare a request body, you use Pydantic models (which can be compared with a class in Java).
When do you use a request body parameter?
To send data to your API, you should use a POST request with a request body parameter. Sending a body with a GET request has an undefined behavior in the specifications, nevertheless, it is supported by FastAPI, only for very complex/extreme use cases. As it is discouraged, the interactive docs with Swagger UI won't show the documentation for the body when using GET.
For the example that we will build up in this section, we would like to send a POST request with festival data representing Hellow Yellow (which was organised at our school at the beginning of the academic year).

The information needed to create Hellow Yellow in the festival table of our database should be contained in a JSON object:
{
    "name": "Hellow Yellow",
    "location": "Geel",
    "startDate": "2025-10-02",
    "endDate": "2025-10-02",
    "province": "Antwerp",
    "comment": "They have free food!"
}
2
3
4
5
6
7
8
# Creating models.py
Somewhere in our program, we have to define the structure we expect when creating a new festival in our database. We will create Pydantic models to define our structure (also called a "model" or "schema") and will do this in a new file called models.py, which will be put in a new folder called models.
As of now, our project structure will look like this:
📂myproject
├── 📄.env
├── 📄config.py
├── 📄database.py
├── 📄main.py
├── 📂models
|   └── 📄models.py
└── 📂queries
    └── 📄festival_queries.py
2
3
4
5
6
7
8
9
Below the code, you can find more detailed information about the contents of the models.py file:
from pydantic import BaseModel
from datetime import date

class Festival(BaseModel):
    name: str
    location: str
    startDate: date
    endDate: date
    province: str
    comment: str = None
2
3
4
5
6
7
8
9
10
At the top of our file, we will always import BaseModel from pydantic. BaseModel is some kind of super model and our own models will inherit properties from it. For more information about inheritance, we would like to refer to the course OO Programming.
The second import (importing date from the datetime library) is only necessary if you need to work with dates in your model.
from pydantic import BaseModel
from datetime import date
2
Next, we define our models. In this case, we only have one model, but you can have as many as necessary. You usually create a model for each table in your database (or at least the tables for which you would like to code POST requests). We define our Pydantic model using the keyword class, followed by the name of our model. To keep things clear, simply take the name of your table in SQL but use a capital letter (so festival becomes Festival). After the name of the model, put BaseModel between parenthesis.
class Festival(BaseModel):
Then we define the keys that we want to accept in our request body. In the case of our festival, we want to be able to receive the following information:
- name
- location
- start date
- end date
- province
- comment
It is important that the attributes of our model (which are the keys we want to accept in our request body) are indented one level so Python understands that they belong to the Pydantic model we're creating.
Make use of default Python data types to indicate which data type each attribute should be.
In case an attribute is not mandatory (with other words: the column would be nulls allowed or NA in our database table), we add = None behind it to give it the default value None in Python, which corresponds to null in our database. (Other default values than None are possible as well of course.)
    name: str
    location: str
    startDate: date
    endDate: date
    province: str
    comment: str = None
2
3
4
5
6
NA or NNA?
How do you know whether a value is mandatory (NNA) or not (NA)?
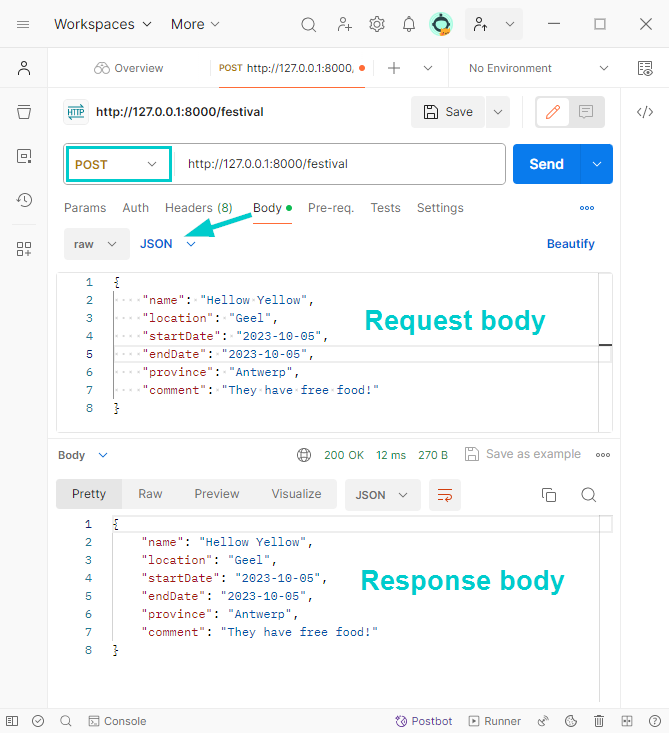
Have a look at the ERD of the database (if you have it somewhere), a good ERD contains this kind of information. The ERD of our simple festivals database looks like this:
You can also have a look at the create script of your SQL database. For example of our festivals database:
CREATE TABLE IF NOT EXISTS festivaldb.festival (
    festivalId serial PRIMARY KEY,
    name varchar(100) NOT NULL,
    location varchar(100) NOT NULL,
    startDate date NOT NULL,
    endDate date NOT NULL,
    province varchar(100) NOT NULL,
    comment varchar(250)
);
2
3
4
5
6
7
8
9
As you can see, only the comment column is nulls allowed or NA in our table. All other columns are nulls not allowed or NNA, so mandatory.
What about the primary key?
You might wonder why the primary key (festivalId) is not used in our Pydantic model. The reason is that we do not want a user or external system to decide which value the primary key should get. Our database will manage this itself. The primary key is serial in the creation script, so auto-incrementing.
# Declare the request body as a parameter in the endpoint in main.py
Database interaction
In this section we will not have a database interaction yet. We will add this interaction in the section 'Database interaction' further down.
We will now have a look at the main.py file. You can find the code below. Endpoints of the previous chapter are left out here for simplicity. After the code, you can find an explanation.
from fastapi import FastAPI
from models import models

app = FastAPI()

@app.post("/festival")
def create_festival(festival: models.Festival):
    return festival
2
3
4
5
6
7
8
Line 2 in the code above imports the models.py file from the models folder so we can make use of our Pydantic models in main.py.
In lines 6 until 8, you can see a very basic structure for our endpoint. Please notice that our path operation decorator now contains post instead of get.
To use our Festivals Pydantic model, add it to your path operation function, declare it the same way you declared query parameters and declare its type as the model you created, which is Festival.
With just that Python type declaration, FastAPI will:
- Read the body of the request as JSON.
- Convert the corresponding types (if needed).
- Validate the data.
- If the data is invalid, it will return a nice and clear error, indicating exactly where and what was the incorrect data.
- Give you the received data in the parameter
festival.- As you declared it in the function to be of type
Festival, you will also have editor support (e.g. completion) for all of the attributes and their types.
- As you declared it in the function to be of type
- Generate JSON Schema definitions for your model, you can also use them anywhere else you like if it makes sense for your project.
- Those schemas will be part of the generated OpenAPI schema, and used by the automatic documentation.
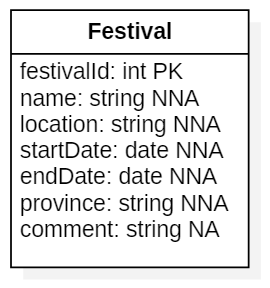
# Sending POST requests using Postman
Let's try out what we made so far using Postman. We will address our endpoint in the following way: http://127.0.0.1:8000/festival (opens new window)
There are some important things to note now:
- The request type should be set to
POST(at the left side of the URL) - In the available tabs, you should click on
Bodyto enter the request body - Make sure
rawandJSONare selected and type the request body in the pane that appears
Here's the JSON again that we mentioned earlier. You can copy and paste it to use as your request body.
{
    "name": "Hellow Yellow",
    "location": "Geel",
    "startDate": "2025-10-02",
    "endDate": "2025-10-02",
    "province": "Antwerp",
    "comment": "They have free food!"
}
2
3
4
5
6
7
8
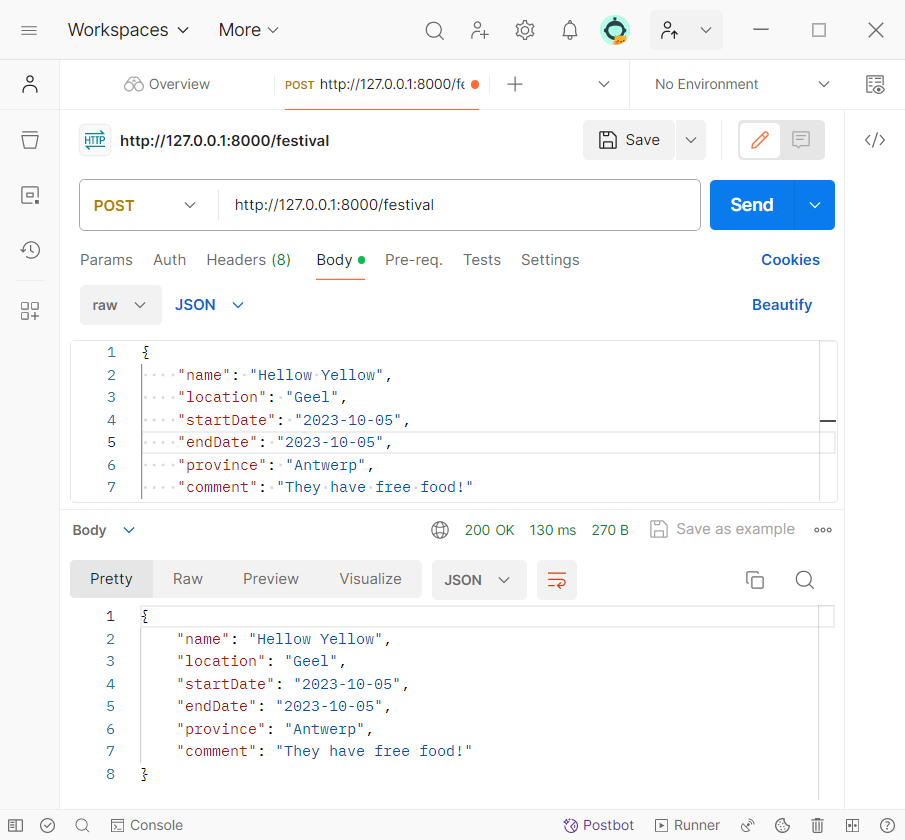
Your request in Postman should now look like this:
WARNING
Depending on the width of Postman on your screen, the settings in the Body pane might look different:

# Database interaction
We of course don't want to just return the information that was sent to the API as request body of a POST request. We usually want to store it in our database. In this section, you can find how it's possible to insert information in a table of your database.
# database.py
The database.py file already contains the necessary code to handle the logic we need to insert information in our database table. The lines of code that are responsible for adding the necessary data in your SQL table are highlighted below. When the try block has finished, the SQL statements are committed to the database.
import psycopg
from fastapi import HTTPException
import config

def connect_to_database():
    try:
        connection = psycopg.connect(config.db_connection)
        return connection
    except psycopg.Error as error:
        print("Error connecting to the database:", error)
        return None

def execute_sql_query(sql_query, query_parameters=None):
    connection = connect_to_database()
    if not connection:
        raise HTTPException(status_code=500, detail="Database connection error")

    try:
        with connection:
            with connection.cursor() as cursor:
                cursor.execute(sql_query, query_parameters)

                if sql_query.strip().upper().startswith("SELECT"):
                    # Execute SELECT queries for GET requests
                    result = cursor.fetchall()
                else:
                    # Non-SELECT queries (INSERT, UPDATE, DELETE) are automatically  committed when the 'with connection' block finishes successfully
                    result = True
                return result
    except psycopg.Error as exception:
        print("Error executing SQL query:", exception)
        raise HTTPException(status_code=500, detail="Database query execution error")
    finally:
        # The 'finally' block ensures the connection is closed even if an error occurred
        connection.close()
2
3
4
5
6
7
8
9
10
11
12
13
14
15
16
17
18
19
20
21
22
23
24
25
26
27
28
29
30
31
32
33
34
35
Committing changes
Committing in SQL refers to the process of permanently applying the changes made within a transaction to the database. When a transaction is committed, the changes become permanent and visible to other users or processes accessing the database. It essentially confirms that the transaction's operations have been successfully completed and updates the database accordingly.
# festival_queries.py
In festival_queries.py, we need to write an SQL query that can add the desired information to our table. An INSERT statement is what we need. The SQL query used to insert a festival into the festival table is highlighted below. Note that all the values that should be inserted are currently the placeholder %s. In main.py, we will provide the necessary values.
festival_name_query = "SELECT name, province FROM festivaldb.festival;"

festival_name_and_province_query = "SELECT name, province FROM festivaldb.festival;"

festivals_by_province_query = "SELECT name, province FROM festivaldb.festival WHERE province = %s;"

festivals_by_name_and_month_query = "SELECT name, location, startDate, endDate, province FROM festivaldb.festival WHERE name LIKE %s AND (TO_CHAR(startDate, 'FMMM') = %s OR TO_CHAR(endDate, 'FMMM') = %s);"

insert_festival_query = "INSERT INTO festivaldb.festival (name, location, startDate, endDate, province, comment) VALUES (%s, %s, %s, %s, %s, %s);"
2
3
4
5
6
7
8
9
# main.py
In main.py, we now add the lines that are highlighted below. They will retrieve the query from festival_queries.py and then execute the query while inserting the values of our festival in the same order as we declared them in our SQL query. Only if the execution of the query was successful, the festival object will be returned to indicate that our insertion succeeded. Otherwise, FastAPI will throw an HTTPException.
from fastapi import FastAPI
import database
from models import models
from queries import festival_queries as queries

app = FastAPI()

@app.post("/festival")
def create_festival(festival: models.Festival):
    query = queries.insert_festival_query
    database.execute_sql_query(query, (
        festival.name,
        festival.location,
        festival.startDate,
        festival.endDate,
        festival.province,
        festival.comment,
    ))
    return festival
2
3
4
5
6
7
8
9
10
11
12
13
14
15
16
17
18
19
# Try it out!
We should now be able to add a festival to our database using a POST request.
Have a look in Neon and verify that the festival was added in the festival table.
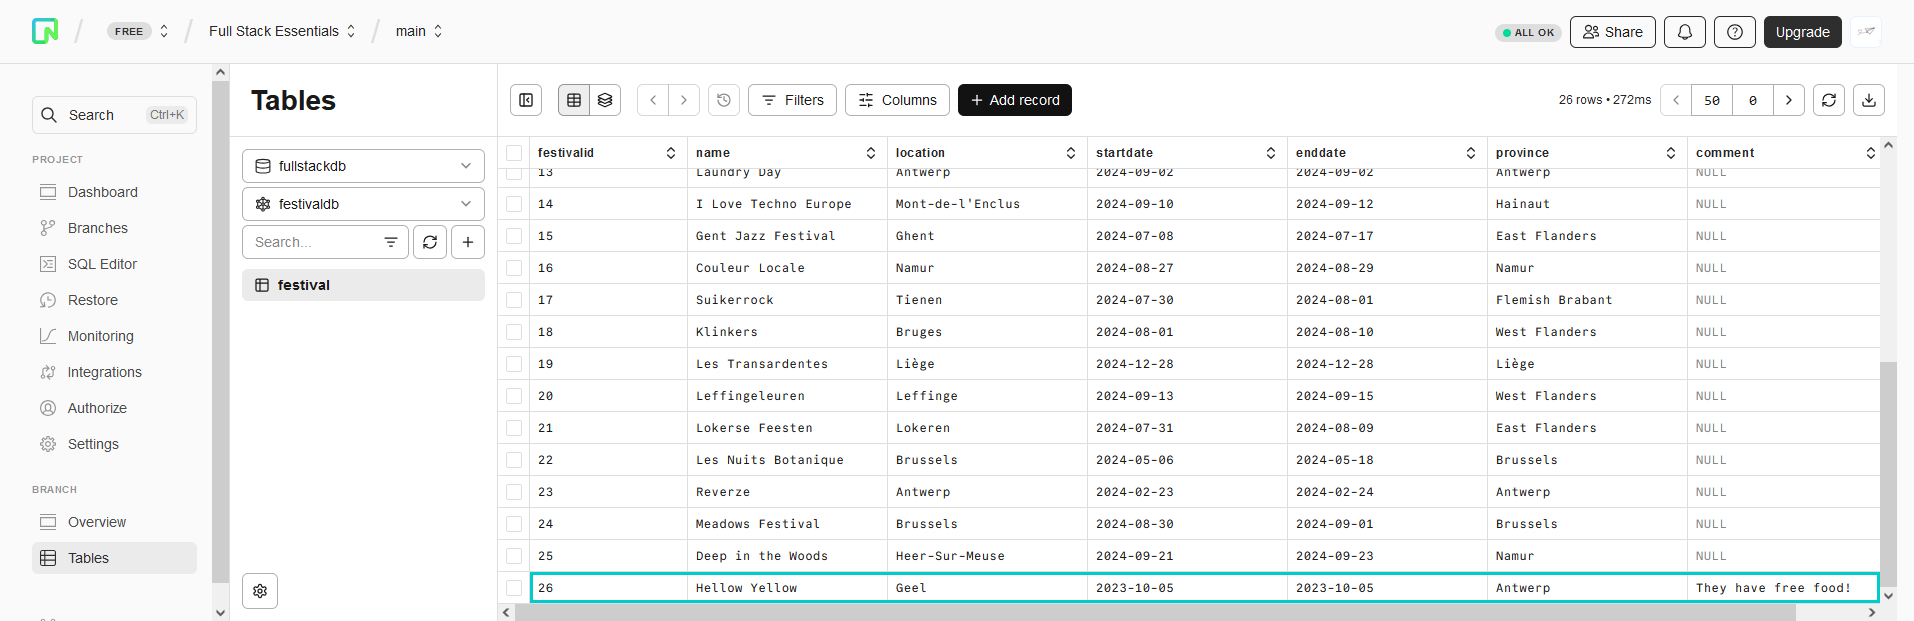
Primary key
Note that the primary key festivalId was filled in automatically. This is because of the serial data type that was used for this primary key in the SQL creation script for this table.
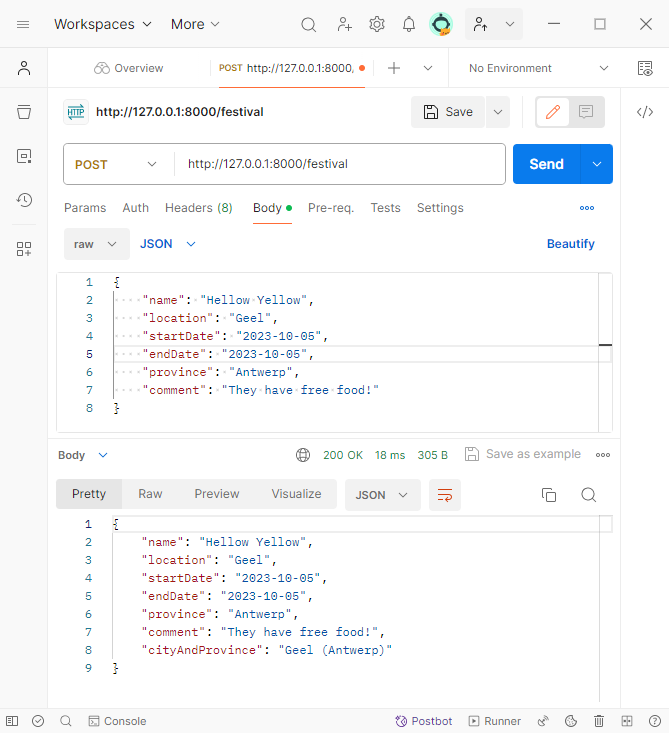
Extra: manipulating the model
Inside of the path operation function, you can access all the attributes of the model object directly and apply your own logic:
from fastapi import FastAPI
from models import models

app = FastAPI()

@app.post("/festival")
def create_festival(festival: models.Festival):
    festival_dictionary = festival.dict()
    festival_dictionary["cityAndProvince"] = festival.location + ' (' + festival.province + ')'
    return festival_dictionary
2
3
4
5
6
7
8
9
10
In this example, we converted our festival object into a dictionary first. Next, we created a new key called cityAndProvince and gave it a value using the existing location and province of the festival object. Note that working with objects of Pydantic classes is very easy, the notation to get an attribute's value out of an object is object.attribute.
If we would try this out in Postman, the result would be as follows: