# PyCharm
For programming in Python, we will make use of PyCharm, the IDE that was also used for Programming Essentials in the first semester.
In case you don't have PyCharm on your laptop yet/anymore, you can find the installation manual here.
# Creating a Python project
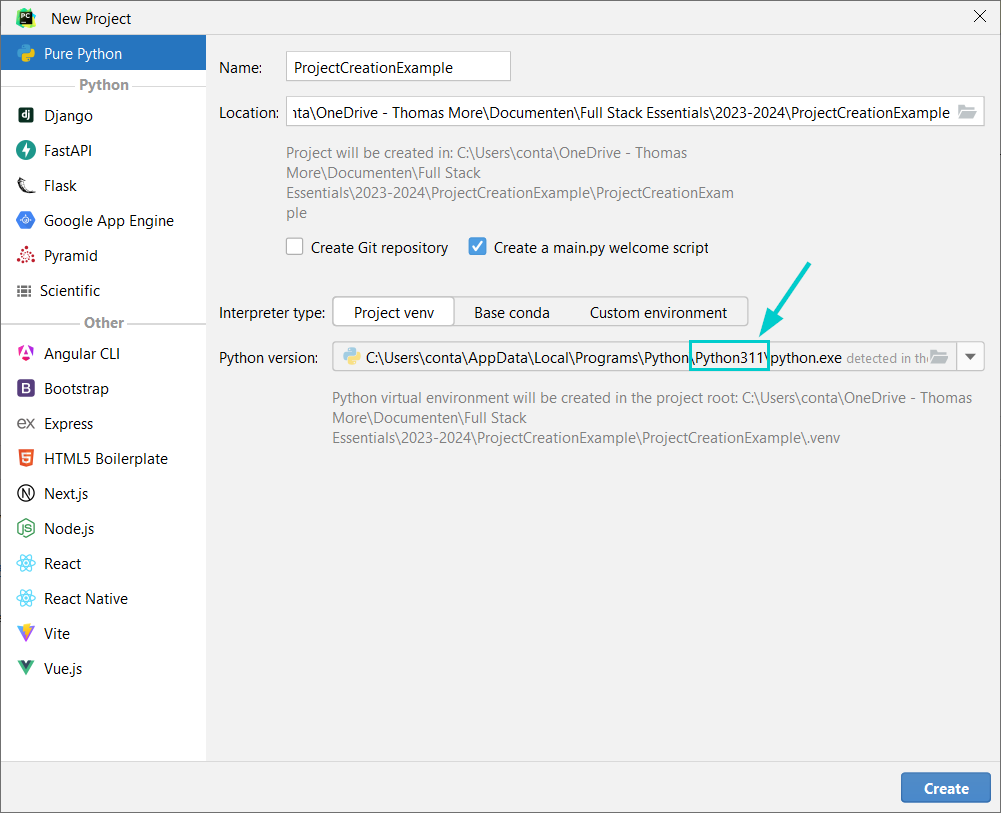
When creating a Python project from PyCharm (File > New Project...), make sure that you create a new virtual environment with Python version 3.10 or higher (in the example below, a virtual environment was created with Python 3.14). Because of important changes that happened in Python 3.10, the code examples given in this course might not work with older Python versions.
In Python, a virtual environment is like a separate space where you can install different versions of Python packages without affecting the rest of your computer. It's like having a sandbox just for your Python projects.
When you create a virtual environment, Python sets up a folder with its own version of Python and a clean slate for installing packages. This means you can have one project using one version of a package and another project using a different version, all without any conflicts.
So, if you're working on different projects or experimenting with different packages, virtual environments help keep things organized and prevent messes in your main Python installation. They're like little playgrounds where your Python projects can play without bumping into each other!
Installing packages? In the virtual environment!
Throughout the course, you'll have to install several packages for Python. As good programmers, we don't want to turn our main Python installation into a mess, so we should install what we need for a project in the virtual environment of that project. So, before installing anything, we should activate our virtual environment using the following command:
<path-to-your-virtual-environment>\Scripts\Activate
In case your terminal is already in the folder of your project where your virtual environment is in as well, you can simply use the following:
.venv\Scripts\Activate
If you are using command prompt instead of Powershell (which is used in the terminal of PyCharm), use the following command to activate the virtual environment:
.venv\Scripts\activate.bat
After running this command, you should see the name of your virtual environment appear in parentheses at the beginning of your command prompt. This indicates that the virtual environment is active, and you can now install packages using pip which will be isolated to this environment. In case PyCharm made the virtual environment for you, the name of the virtual environment is .venv, so (.venv) appears at the beginning of your command prompt.
Pay attention: the commands above work for Windows as operating system. In case you're working with MacOS, you should do the following:
First create a virtual environment using the following command in case Pycharm did not create it for you yet:
python3 -m venv .venv
Next, activate the virtual environment using the following command:
source .venv/bin/activate
Creating a virtual environment in PyCharm
As an alternative to creating a virtual environment from a command line, you can also create it from PyCharm (for example, after cloning an existing Github repository). To create a virtual environment in PyCharm from an existing project:
- Click in the bottom right corner on
<No interpreter>
- Click on
Add New Interpreterand next onAdd Local Interpreter...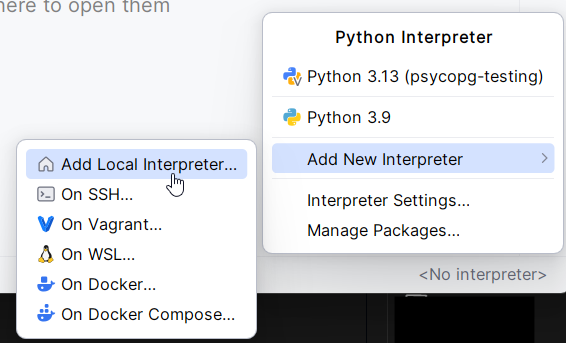
- Verify that a Python version of 3.10 or higher is selected as
Base pythonand click onOK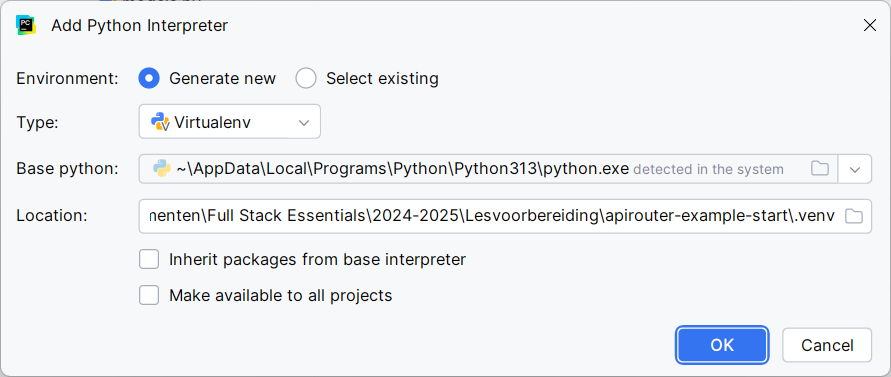
Got stuck?
Did your program / API get stuck when running it locally? Go to the task manager (Ctrl + Alt + Del) and kill the Python process.