# Neon database hosting
# What is Neon?
We will host our databases in the cloud on the Neon database platform. Neon is an online platform that helps you store and manage data using PostgreSQL, a popular database management system (DBMS). On this page, we will guide you through the process of setting up a database in Neon.
# Creating an account
Go to https://neon.com/ (opens new window) and click on the green 'Sign Up' button in the top right corner.

Choose to create a free account using your GitHub credentials.
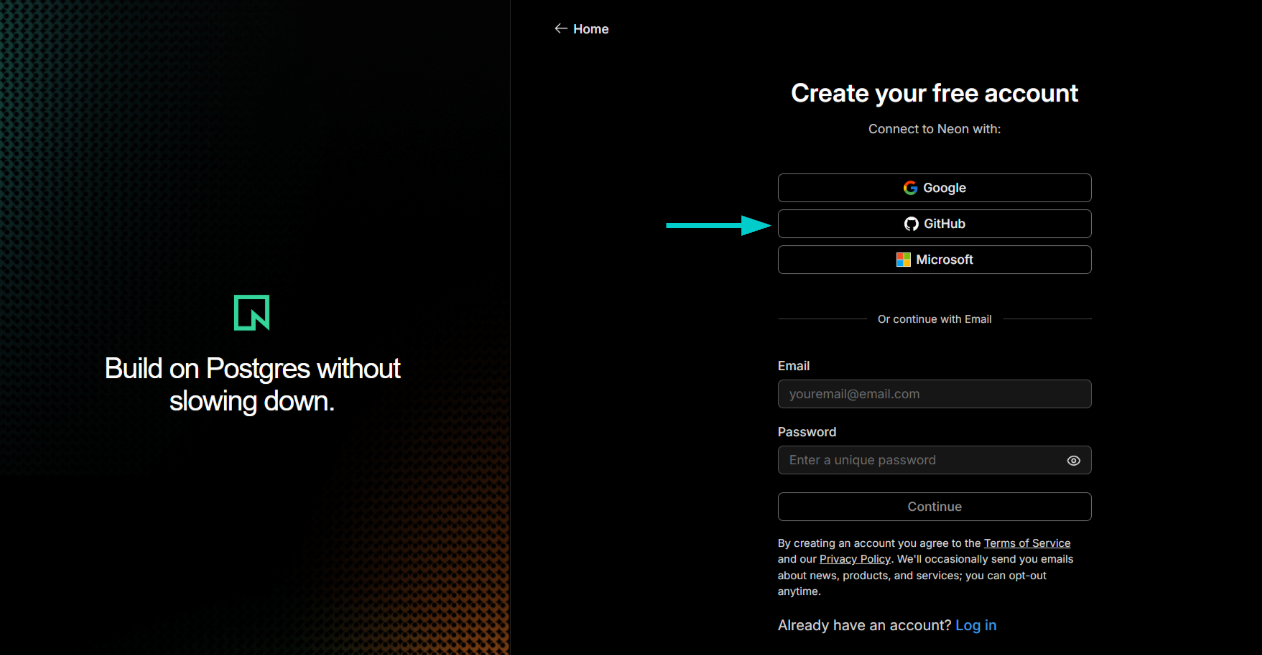
If requested, log in to your GitHub account.
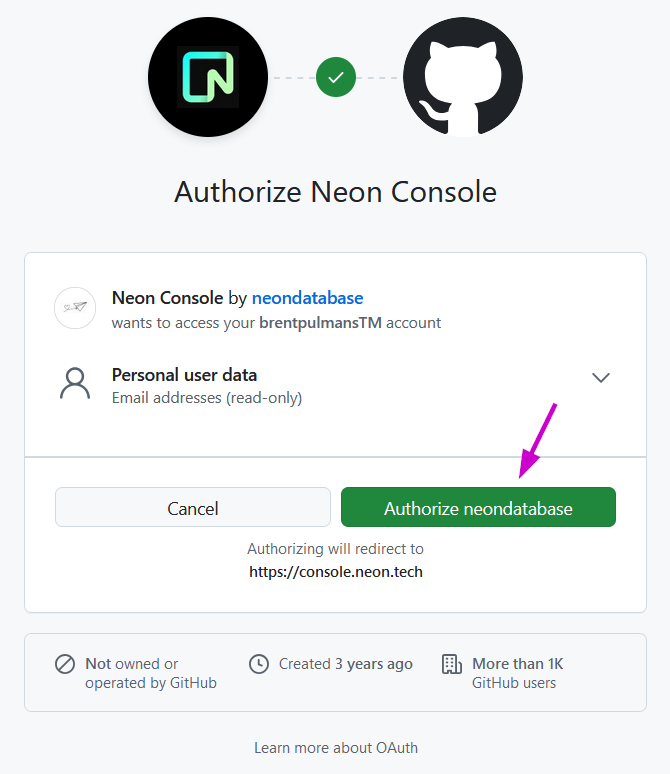
Next, click on ‘Authorize neondatabase’.
On the ‘Get started with Neon for Free’ page, enter a project name (e.g. ‘Full Stack Essentials’). As Postgres version, keep the default value of 17. Choose ‘AWS’ as Cloud Service Provider’. In the Region dropdown, choose ‘Europe (Frankfurt)’.
Click on ‘Create project’.

You will now be guided to your Neon dashboard.
On the dashboard, you will see a pane called ‘Connection Details’. We will need this information later to connect our Python back-end to the database on Neon.
On the left side, you will see a navigation menu that guides you to the most important sections. In this course, you will mostly need the ‘SQL Editor’ and ‘Tables’ sections.

# Example of creating a table
Go to the ‘SQL Editor’.
Clear the text that’s now in the editor and paste the following SQL statement:
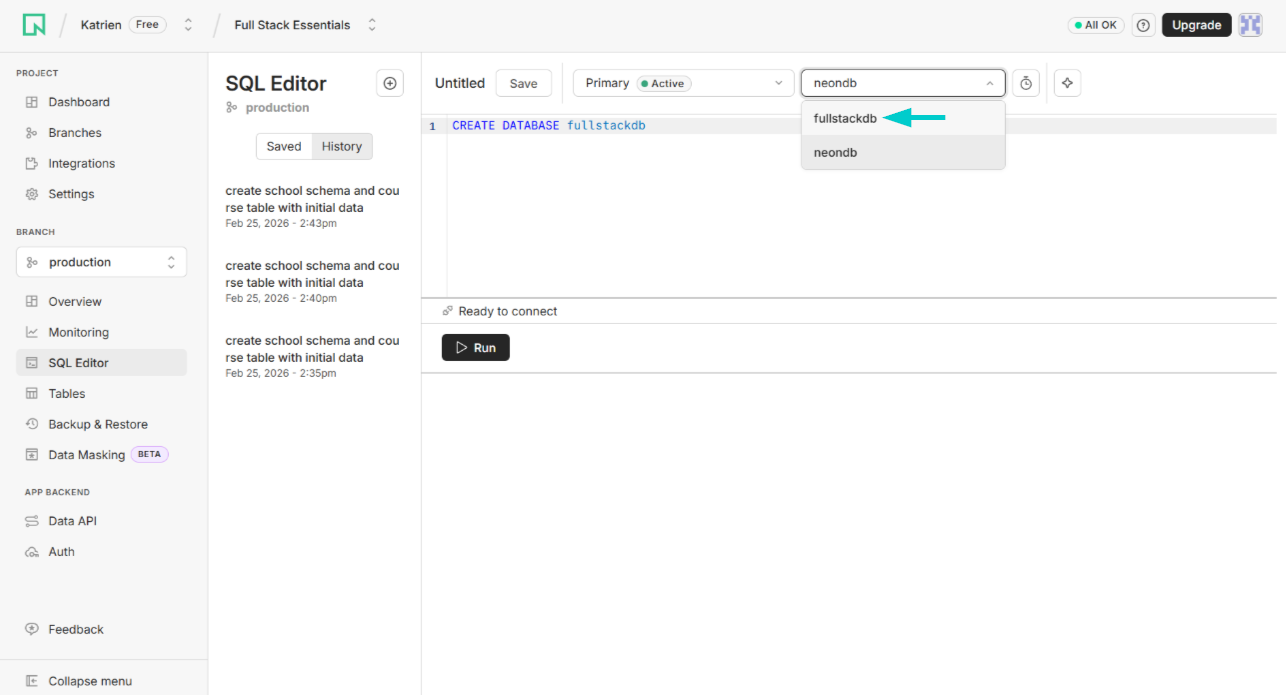
CREATE DATABASE fullstackdb;
At the top, open the dropdown that now says neondb and choose the newly created database fullstackdb.
Clear the text that’s now in the editor and paste the following create script in there:
DROP TABLE IF EXISTS school.course;
DROP SCHEMA IF EXISTS school;

CREATE SCHEMA IF NOT EXISTS school;
CREATE TABLE IF NOT EXISTS school.course (
    courseId SERIAL PRIMARY KEY,
    name VARCHAR(100) NOT NULL,
    credits INT NOT NULL,
    phase INT NOT NULL,
    semester INT NOT NULL
);

INSERT INTO school.course (name, credits, phase, semester)
VALUES
    ('Programming Essentials', 6, 1, 1),
    ('Data Essentials', 6, 1, 1),
    ('Webdesign Essentials', 6, 1, 1),
    ('Operating Systems', 6, 1, 1),
    ('Full Stack Essentials', 3, 1, 2);
2
3
4
5
6
7
8
9
10
11
12
13
14
15
16
17
18
19
PostgreSQL vs. MySQL
There are some slight differences in syntax between PostgreSQL and MySQL. One difference can be seen above.
In Data Essentials, you learned that a primary key can be made auto-incrementing using the auto_increment keyword. In PostgreSQL however, the data type of the primary key is set to serial instead of int to indicate that this should be an auto incrementing number. serial automatically creates a sequence to generate unique values. However, serial is not strictly a data type; it’s more of a shorthand for creating an int column with an associated sequence and a default value tied to that sequence. So, while the serial keyword is used instead of int for auto-incrementing, under the hood it’s still an integer with additional behavior.

Click on the ‘Run’ button. If everything goes right, you should now see the following message: ‘Statement executed successfully’.
Now go to the ‘Tables’ page via the menu on the left side.
The ‘school’ schema that you created a moment ago, which does not contain any tables at this point, is selected.
Click on the ‘course’ table, its contents will now appear.

You have now created a table in a database on the Neon database platform.
# Inviting Team Members to Your Database
Neon allows you to share databases and projects with your team members, making collaboration easier—especially for group projects where everyone needs access to the same database.
To invite team members:
- Go to your project settings.
- Navigate to the "Collaborators" section.
- Click the "Invite" button.
- Enter your team members' email addresses and send the invitation.
Once invited, your teammates will be able to access the project on Neon, view database tables, and use the SQL editor.
